In a previous guide I showed how to set up a private IPFS cluster now in this case I also need a public IPFS gateway so files on the private cluster are accessible by the public. This gateway will run on one of the IPFS nodes in the cluster, and I will use Nginx as a proxy to the local ipfs gateway that ships with the IPFS daemon. As usual this is on a Ubuntu 18.04 server. So here we go with how to set up a public IPFS gateway!
What You Need
- A domain or sub-domain pointed to the server IP where your IPFS is
- A cup of coffee
Install Nginx And Configure
apt install nginx -y
Check status to make sure it started and is not throwing any errors:
systemctl status nginx
Get your IP and open it with browser to make sure Nginx is serving its default page:
curl -4 icanhazip.com
Now browse to http://your-ip-here and you should see the Nginx default page “Welcome to Nginx!“.
Set Up your nginx configs:
mv /etc/nginx/sites-available/default /etc/nginx/sites-available/default_back
nano /etc/nginx/sites-available/default
Copy and paste this config (change ipfs.weusertm.com to your domain)
server {
    server_name ipfs.weusertm.com;
    server_tokens off;
    listen 443 ssl;
    listen [::]:443 ssl;

    location / {
        proxy_pass http://localhost:8080;
        proxy_http_version 1.1;
        proxy_set_header Upgrade $http_upgrade;
        proxy_set_header Connection 'upgrade';
        proxy_set_header Host $host;
        proxy_cache_bypass $http_upgrade;
    }
}
Test that new config syntax and make sure it is ok:
nginx -t
If all good reload:
systemctl reload nginx
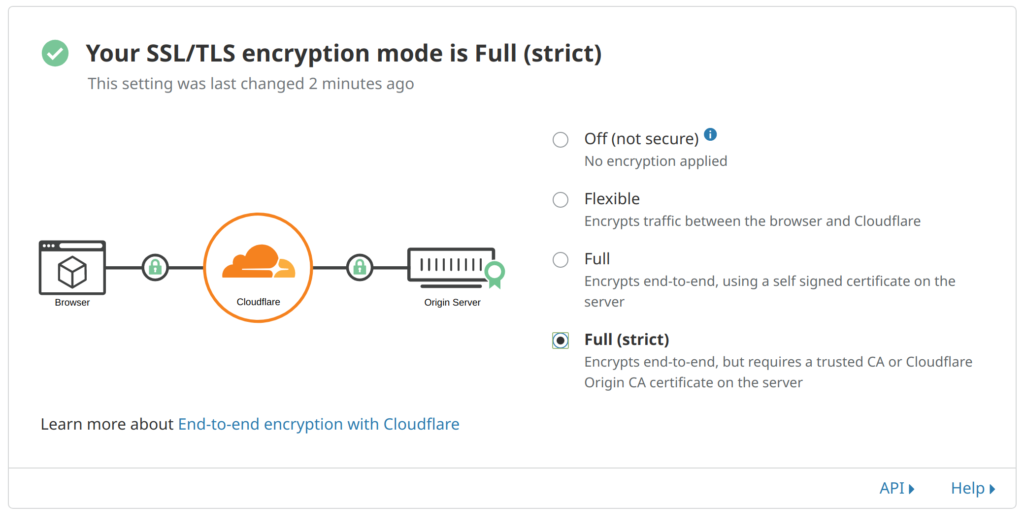
Of course we want to offer https. If you use CloudFlare you can get away with not installing CertBot for Lets Encrypt and you will have a good https connection. But keep in mind this is only one way encryption, if you want full encryption both ways you need to have a valid SSL on the IPFS machine as well. For full two way encryption you need to change a setting in your CloudFlare or you will end up with an error “Too many redirects” after running CertBot. You want your setting like so in CloudFlare > SSL/TLS.
Set Up SSL On IPFS Machine
Note: Domain you are using for this must resolve to your IPFS server IP before continuing with this part or certbot will fail to get a SSL for it.
add-apt-repository ppa:certbot/certbot
apt update -y
apt install python-certbot-nginx -y
Make certbot do some work:
certbot --nginx -d ipfs.weusertm.com
Certbot will update your nginx.conf for you. When asked if you want to redirect all traffic to https choose that option (#2).
Let’s harden things a bit with Diffie-Hellman:
openssl dhparam -out /etc/ssl/certs/dhparam.pem 2048
Add that line to your nginx.conf under server {. Here is a snippet as an example:
server {
    ssl_dhparam /etc/ssl/certs/dhparam.pem;
    server_name ipfs.weusertm.com;
    server_tokens off;
    listen 443 ssl;
    listen [::]:443 ssl;
Test syntax again and reload:
nginx -t
systemctl reload nginx
Add Cron To Keep CertBot Renewing The SSL
crontab -e
Add this line:
15 3 * * * /usr/bin/certbot renew --quiet
That is it! Now when you visit yourdomain.com/ipfs /hash you can view the file!


